Adding text or graphics to a PDF file
Using Acrobat Reader’s ability to add text et cetera has proven unreliable for me. On multiple occasions I have lost all the text added to a PDF file. When your filling in 20-plus pages worth of permit forms this is a huge waste of time and extremely annoying.
So I set out to find another way using the free and open-source tools I have available.
Note
This is not about PDF forms; special PDF files that contain editable fields when opened with Adobe Acrobat.
My first thought was to convert every page in the PDF to a JPEG picture. Then I would edit these JPEGs in gimp, and then re-assemble them into a PDF. In this way, you could easily remove text and images from the document beyond recovery. Sometimes you see people cover up part of a PDF with white rectangles. What most of them don’t realize is that you can still read the underlying text by copying it and pasting it into a text editor.
This would also inhibit screen readers and automatic processing of the resulting PDF. And it would make the resulting PDF huge, especially if you convert the original PDF at a reasonable resolution for printing, say 300−600 DPI. So I decided to try and add to a PDF without converting to a bitmap. To do this I first split the PDF into multiple pages using pdfinfo and ghostscript, using the following shell-script excerpt.
N=`pdfinfo input.pdf | awk '/Pages:/ {printf("%s",$2)}'`
GSOPTS="-DNOPAUSE -sDEVICE=pdfwrite"

rm -rf blz
mkdir blz

for NUM in `jot $N 1`; do
    gs ${GSOPTS} -dFirstPage=${NUM} -dLastPage=${NUM} \
        -sOutputFile=blz/blz-${NUM}.pdf formulier_OBM.pdf \
        -c quit >/dev/null 2>&1
done
This left me with a subdirectory of PDF files, one for every page in the original document. To assemble these into a document, I used TeX. To be precise, xelatex with the memoir class.
There where several reasons for using xelatex. It deals natively with UTF-8
text. And it can use any installed font, it is not limited to fonts from the
TeX installation. It also produced much smaller output in my test than
pdflatex.
So I created a TeX file where I included the pages and extra elements in
a LaTeX picture environment. Below is an example that produced the picture
on the bottom of this page.
\documentclass[a4paper,oneside]{memoir}

\usepackage{fontspec}
\usepackage{graphicx}
\usepackage{marvosym} % for \RectSteel
\usepackage{color}

% Fill in a checkbox
\newcommand{\check}{\put(#1){\RectSteel}}

\setmainfont{Tech} % A handwriting-like font

\begin{document}
\pagestyle{empty}
\setlength{\unitlength}{1mm}

\begin{picture}(1,1)
    \put(-50,-250){\includegraphics{blz/blz-10}}
    \color{blue}
    \checkbox{65.5,-36.2}
    \checkbox{65.5,-40.6}
    \put(65,-61){1234\enskip{}AB}
    \put(65,-76){56}
    \put(65,-122){Geenweg}
    \put(65,-137){Nergenshuizen}
    \checkbox{65.5,-156.5}
    \put(65,-205){Nergenshuizen}
    \put(65,-219){C}
\end{picture}\clearpage

\end{document}
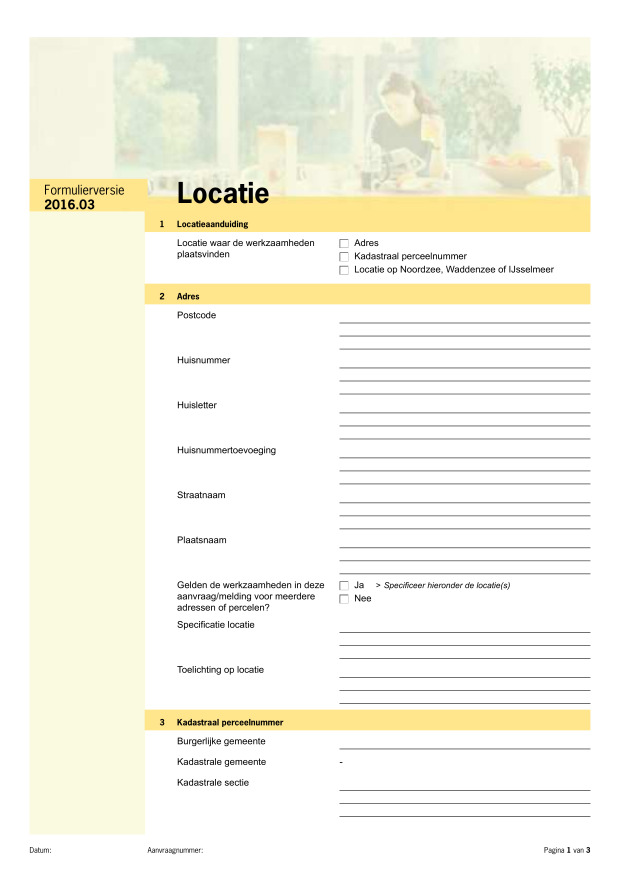
You will need to match the page size of the TeX document to that of the PDF files you are including (A4 in my case). The first thing to include in the picture is the original page, which is shown below. In this case, the original page was positioned correctly when using coordinates (-50,-250). This will be different for other documents. This is a page from a government permit application that I had to fill in at work. Other items are added to the picture environment after the image so they will appear on top of the original page.
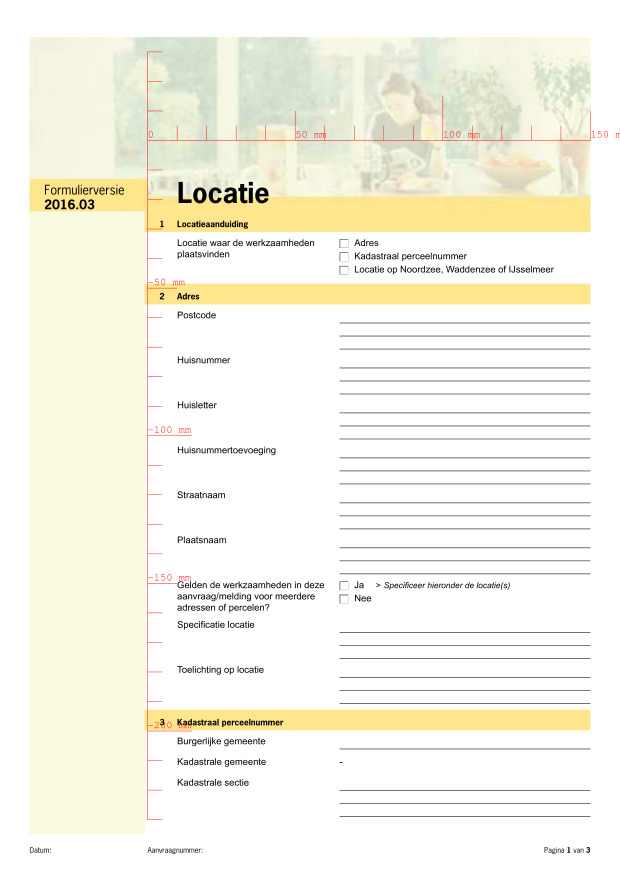
To help me position items om the page, I defined the \ruler command. This
draws a pair of rulers in red on top of the original page. The rulers are
marked in 10 mm increments, and I set the unit size for the picture
environments to 1 mm. This ruler command was called in ever picture
environment.
\newcommand{\ruler}{{\fontspec{TeX Gyre Cursor}\color{red}%
\put(0,0){\line(0,-1){230}}\put(0,0){\line(1,0){150}}%
\put(0,-100){\line(1,0){15}}\put(0,-200){\line(1,0){15}}%
\put(0,-10){\line(1,0){5}}\put(0,-20){\line(1,0){5}}\put(0,-30){\line(1,0){5}}%
\put(0,-40){\line(1,0){5}}\put(0,-50){\line(1,0){10}}\put(0,-60){\line(1,0){5}}%
\put(0,-70){\line(1,0){5}}\put(0,-80){\line(1,0){5}}\put(0,-90){\line(1,0){5}}%
\put(0,-110){\line(1,0){5}}\put(0,-120){\line(1,0){5}}\put(0,-130){\line(1,0){5}}%
\put(0,-140){\line(1,0){5}}\put(0,-150){\line(1,0){10}}\put(0,-160){\line(1,0){5}}%
\put(0,-170){\line(1,0){5}}\put(0,-180){\line(1,0){5}}\put(0,-190){\line(1,0){5}}%
\put(0,-210){\line(1,0){5}}\put(0,-220){\line(1,0){5}}\put(0,-230){\line(1,0){5}}%
\put(0,0){\line(0,1){30}}\put(0,10){\line(1,0){5}}\put(0,20){\line(1,0){5}}%
\put(0,30){\line(1,0){5}}%
\put(10,0){\line(0,1){5}}\put(20,0){\line(0,1){5}}\put(30,0){\line(0,1){5}}%
\put(40,0){\line(0,1){5}}\put(50,0){\line(0,1){10}}%
\put(60,0){\line(0,1){5}}\put(70,0){\line(0,1){5}}\put(80,0){\line(0,1){5}}%
\put(90,0){\line(0,1){5}}\put(100,0){\line(0,1){15}}%
\put(110,0){\line(0,1){5}}\put(120,0){\line(0,1){5}}\put(130,0){\line(0,1){5}}%
\put(140,0){\line(0,1){5}}\put(150,0){\line(0,1){10}}%
\put(0,1){0}\put(0,-49){-50 mm}\put(0,-99){-100 mm}\put(0,-149){-150 mm}%
\put(0,-199){-200 mm}%
\put(50,1){50 mm}\put(100,1){100 mm}\put(150,1){150 mm}%
}}
Adding the ruler produced the following image.
Using this ruler as a guide I added extra \put commands to add text and
fill checkboxes. For fun, I used a handwriting-like font, and made all the
added items blue as if they were made by a pen.
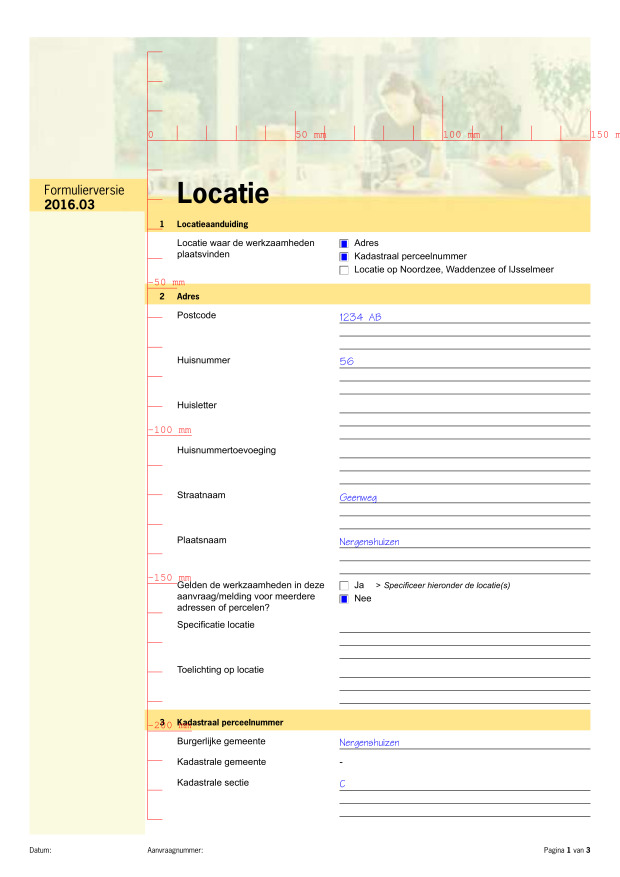
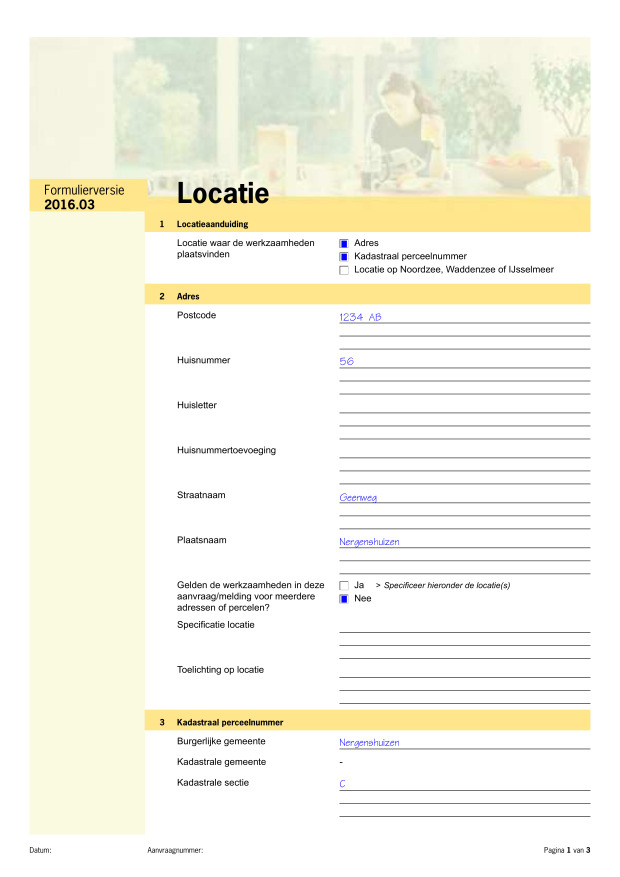
Once a page was filled in I commented out the ruler, leaving a nicely formatted page.
For comments, please send me an e-mail.
Related articles
- Adding text or graphics to a PDF file (again)
- Adding an overlay to each page of a pdf file
- PDF tricks
- Converting PostScript and PDF images to SVG format
- Making a PDF from scanned B/W pages