Adding scale markers to a scanned image
in a previous article we saw how a desktop scanner can be used for macro photography. Often it would be handy to include a visual reference of the scale of such pictures. In this howto I’m using asymptote to add accurate scales next to the picture.
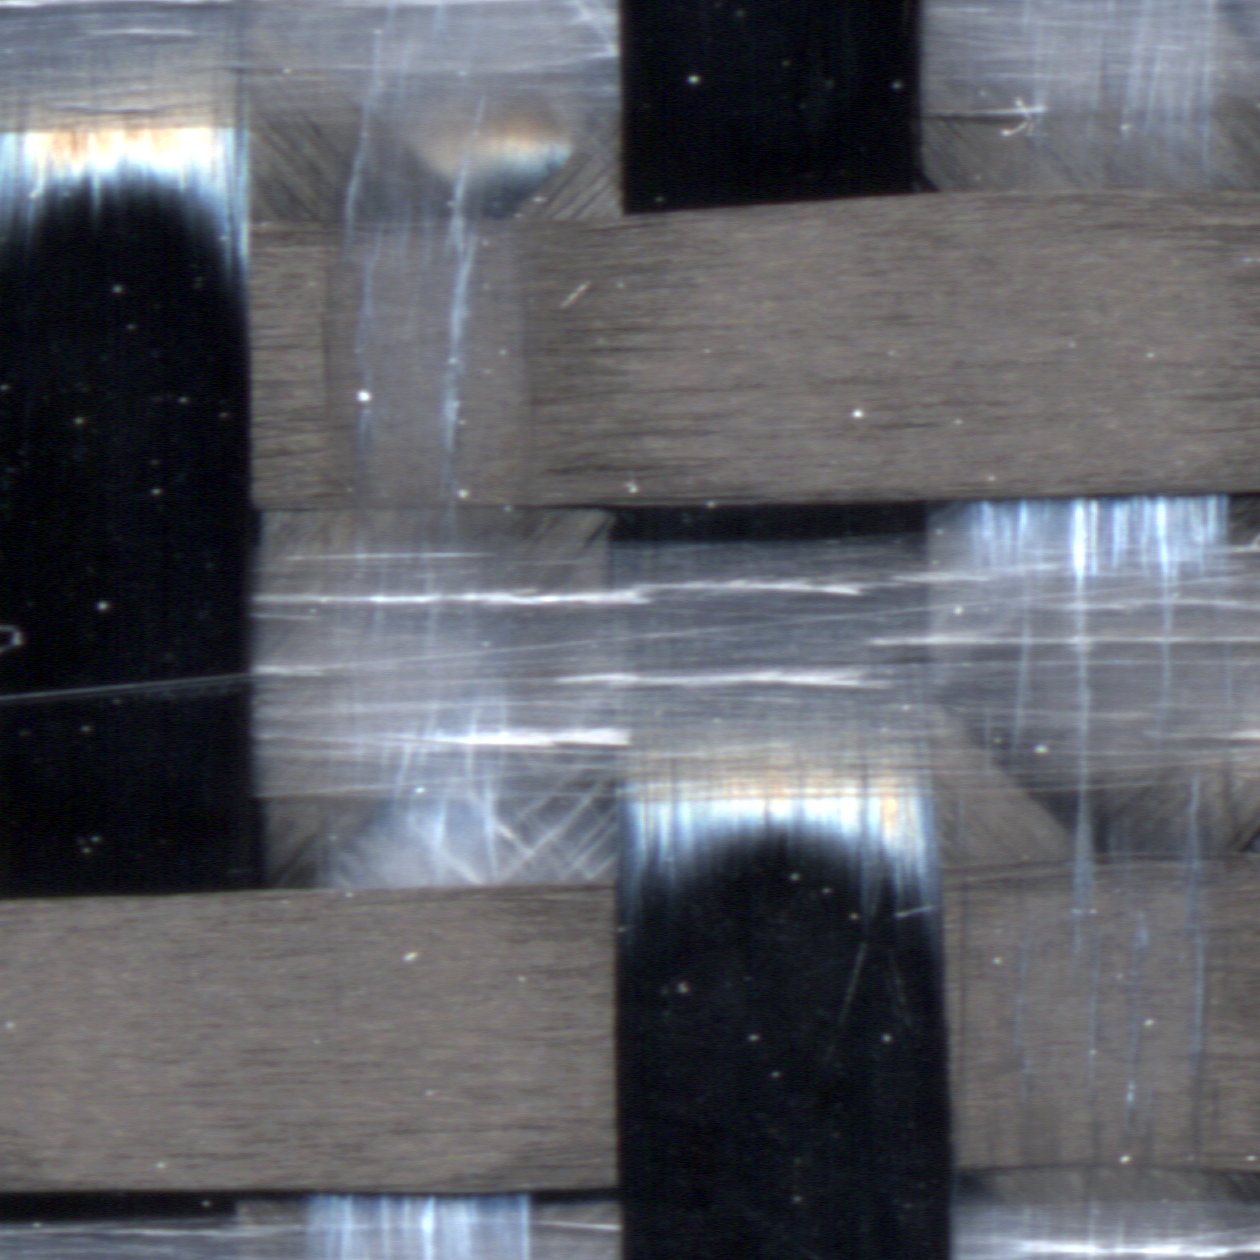
The starting point is a scan of a laminate that I made. The scan was made at
3200 pixels per inch. I wanted to enlarge and show a 10 mm by 10 mm area of
this picture. So I made a 10/25.4×3200= 1260 pixels by 1260 pixels cutout and
saved that as a JEPG file named scan3200-uitsnede.jpg, setting the
resolution to 300 pixels per inch to enlarge it. This picture is shown below.
This laminate was made by resin infusion under vacuum. The resin used is a clear
epoxy. The fabric used is a carbon fiber and dyneema hybrid.
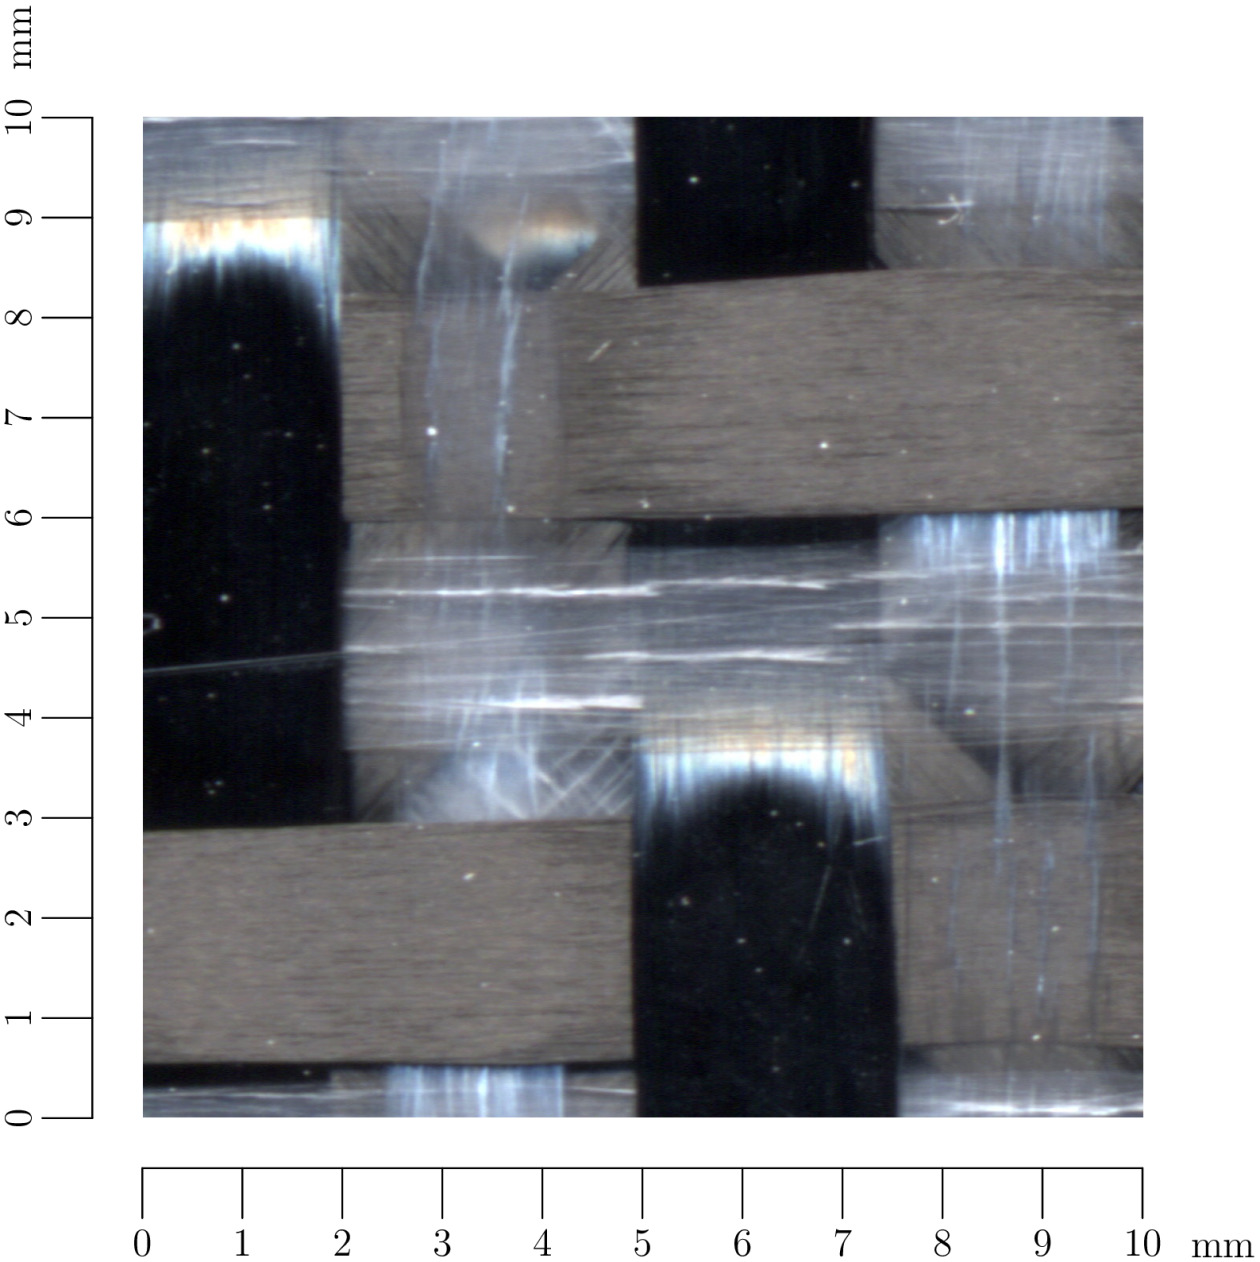
We begin the asymptote file by setting an appropriate unitsize. Since the
original picture was scanned at 3200 dpi, and the cutout at 300 dpi, we’re
going to use a scale of 3200/300.
unitsize(10.667mm);
We can generate a Label from an image with the graphic function. This
requires a file in encapsulated PostScript format, though. The conversion is
done using ImageMagick.
convert scan3200-uitsnede.jpg eps2:scan3200-uitsnede.eps
The second argument to the convert command contains an explicit image
format qualifier in the form of the eps2: string. This selects level II
encapsulated postscript format. This format uses compression and is almost
identical in size to the original JPEG file.
We can now embed the picture in the asymptote file.
label(graphic("scan3200-uitsnede.eps"), (5,5));
Because of the unitsize used, the picture is exactly ten units wide and high.
Positioning the center at (5,5) ensures that the bottom left corner is at
(0,0). We can now add the horizontal axis below the image.
The dimensions of the axis are encoded in parameters so they can be easily
changed. The axis is drawn half a unit below the image, and the tick marks
extend to one unit below the image.
picture xaxis;
int xlength = 10;
real offset = -0.5, tickto = -1;
draw(xaxis, (0,offset)--(xlength,offset));
for (int i=0; i<=xlength; i+=1) {
    draw(xaxis, (i,offset)--(i,tickto));
    label(xaxis, Label(format("%d", i)), (i,tickto), S);
}
label(xaxis, Label("mm"), (xlength+.8,tickto-.1), S);
add(xaxis);
The axis in drawn a separate picture to make it easier to manipulate. This
will be clear when we put in the vertical axis.
picture yaxis;
int ylength = 10;
offset = 0.5; tickto = 1;
draw(yaxis, (0,offset)--(ylength,offset));
for (int i=0; i<=ylength; i+=1) {
    draw(yaxis, (i,offset)--(i,tickto));
    label(yaxis, Label(format("%d", i)), (i,tickto), N);
}
label(yaxis, Label("mm"), (ylength+.8,tickto), N);
add(rotate(90)*yaxis);
Here the whole axis is drawn horizontally (much like the horizontal axis) to keep the labels aligned with the axis. It is rotated through 90° before being drawn. This is much easier than drawing it yourself. Especially if you would have to draw an axis under a weird angle of say 23°.
The asymptote file is then processed into a PDF file.
asy -q -f pdf -noprc scan3200-uitsnede.asy
This results in a file scan3200-uitsnede.pdf which is prefectly suited for
e.g. inclusion in LaTeX documents.
For showing the result here I used ImageMagick again to make JPEG file.
convert -density 300 scan3200-uitsnede.pdf -scale 79.4% \
-flatten scan3200-uitsnede2.jpg
This picture is shown below.
For comments, please send me an e-mail.
Related articles
- Patching CalculiX Graphics to fix flipped screen hardcopy
- Creating a screenshot in X11
- ImageMagick: convert vs Wand
- PDF tricks
- img4latex